Using VS Code for Compiling COMSOL® API for Java Projects
Java files can be used with the COMSOL API to programmatically complete modeling tasks via code instructions instead of interacting directly with the user interface (UI). In this article, we will demonstrate how to use Visual Studio Code (VS Code) to create, edit, and compile Java files for use with COMSOL Multiphysics®. VS Code is platform independent, similar to Java; however, this step-by-step guide demonstrates how to set up the editor to compile Java code that uses the COMSOL API.
Note: The general procedure is shown using the Windows® operating system, but details of the procedure may differ depending on your operating system or future updates to VS Code.
Install and Open VS Code
Download Visual Studio Code for your operating system. Run the setup file; you may need to agree to the terms and choose your preferred settings. Complete the installation and open VS Code.
A screenshot of VS Code being installed on Windows®.
Install Java Extensions
Next, we install the Java extensions for VS Code. Open Extensions (Ctrl+Shift+X) and search for Java in the Marketplace. Select the Extension Pack for Java and click Install. The installation will take a few minutes and install a set of extensions. VS Code may suggest that you restart your workstation.

The Extension Pack for Java page in VS Code, after being installed through the Extension Marketplace.
After you install the Extension Pack for Java, follow the walkthrough to get started. You can access walkthroughs to help you get started by opening the Help menu and selecting Welcome.
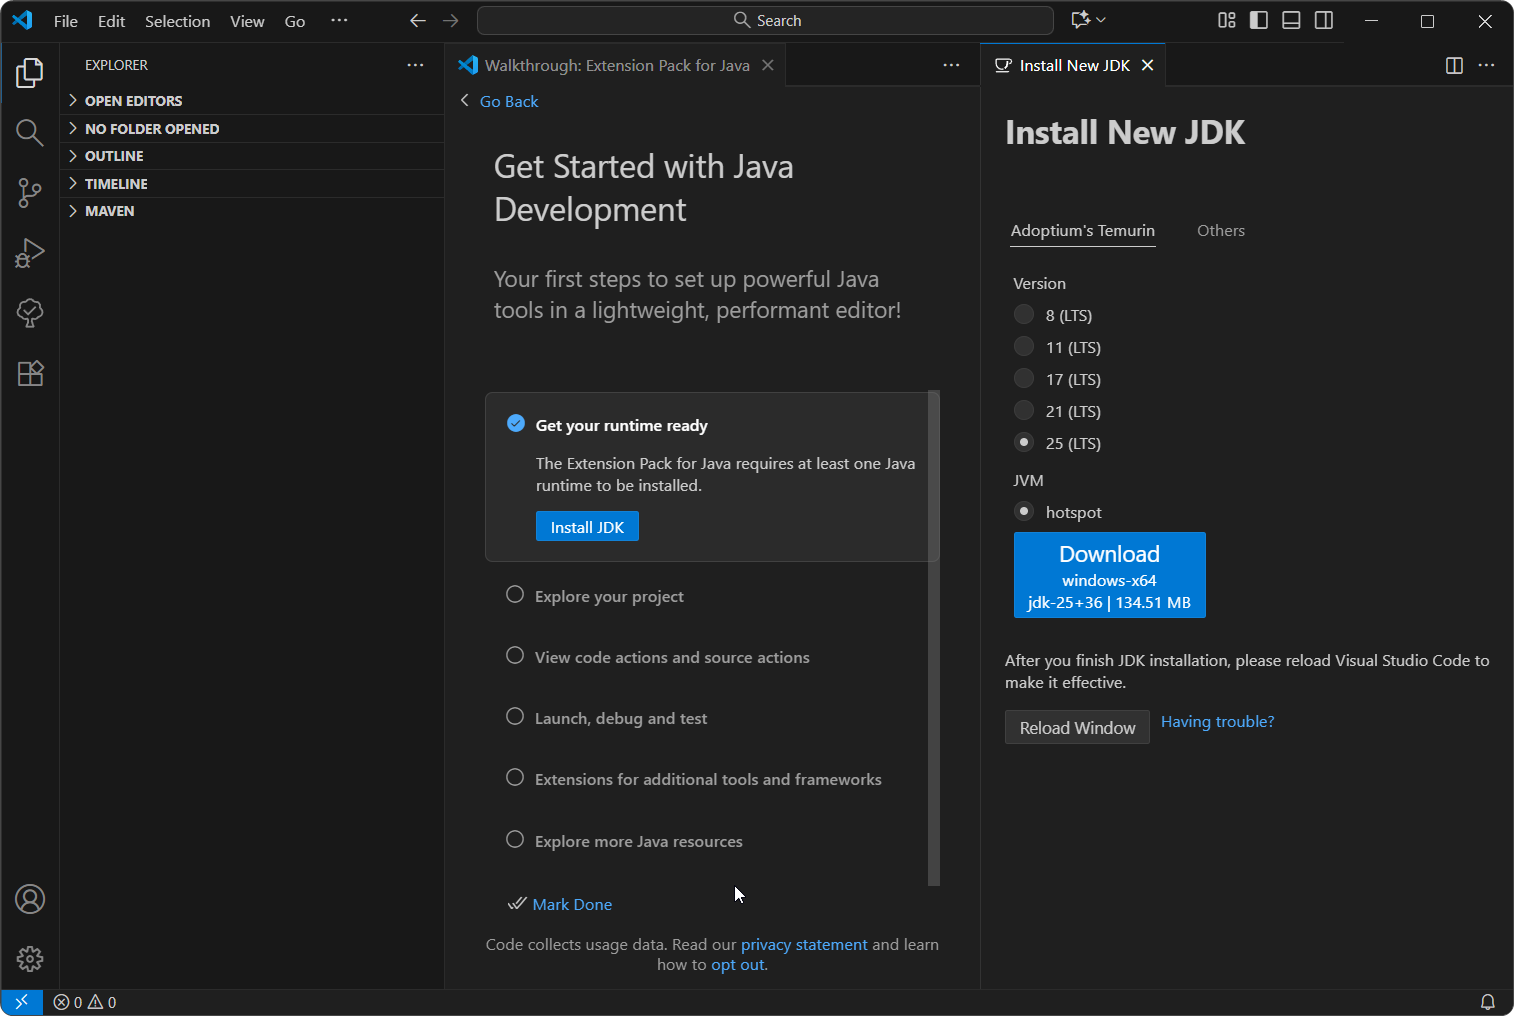
The walkthrough page associated with the Extension Pack for Java prompts the user to install a new JDK.
Note: The JAR files included with the COMSOL API are compiled using Java 8, so some Java Development Kits (version 21 or higher) may not work with Java 8 without warnings or requiring modifications to the settings.
Create Java File
To start, we create a small test Java file (available to download here) that uses the COMSOL API to connect to a COMSOL Multiphysics® server, solve a model, and print the result on the screen. In our case, we will create a few folders in the C drive and save the file to C:\models\java. This Java file assumes our model file is in the same folder. The busbar.mph file is included with COMSOL Multiphysics®, but you can also download it from the Application Gallery and save it in the newly created directory.
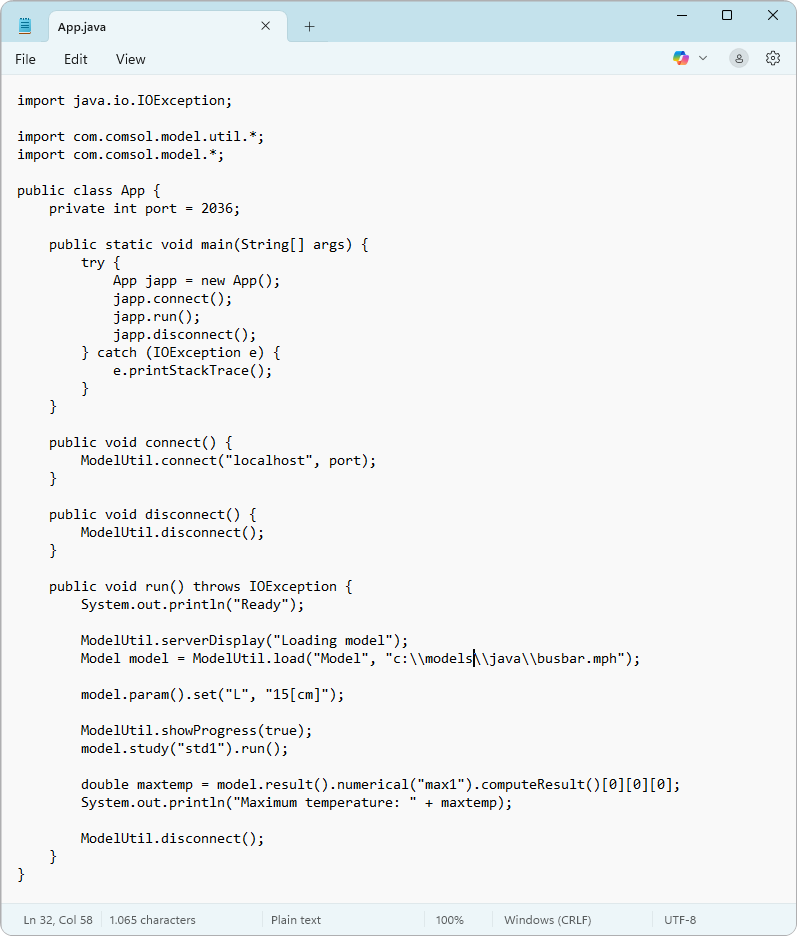
A screenshot of the test Java file.
Create a Java Project
Now we create a new Java project. This creates settings files and a directory structure that VS Code will use when compiling your project.
Open the Command Palette by pressing Ctrl+Shift+P or by selecting View from the menu and choosing Command Palette. Select Java: Create Java Project… from the expanded drop-down list.

The Command Palette open in VS Code.
From there, select the No build tools option. Alternatively, you can choose one of the suggested build tools.

A screenshot of VS Code with the options for project type displayed with No build tools selected.
We are then prompted to select the project location. We will use the folder C:\models\java for the project location. Click the Select the project location button to close the dialog box.

The Windows® Explorer open with the project location selected.
Next, we are prompted at the top of the window to name the Java project. Enter the name javatest. Then, VS Code might ask if you trust the authors of the files in this location. Choose: Yes, I trust the authors.

In VS Code, the project name is entered for the new Java project created.

The dialog box that displays in VS Code, asking the user if they trust the authors of the files in the selected folder.
Now, open the default App.java file by selecting it under the src node in the Explorer pane.

A screenshot of VS Code with the App.java file open in the Java test project.
If you do not have any previously written code for your project, you can start coding by modifying this file. In this case, you can replace its current contents with those of the App.java file shown previously.

The contents of the test Java file in the VS Code editor, in which multiple syntax errors have been highlighted.
After replacing the file and opening it in the code editor, you will see multiple parts of code in which a syntax error has been detected (underlined with a red line). This is expected because VS Code does not know where the JAR files in COMSOL Multiphysics® are installed. To define the paths to these JAR files, open the project settings. You can do this by selecting the settings.json node under .vscode in the Explorer pane.

The project settings open in VS Code.
Change the settings of java.project.referencedLibraries to C:/Program Files/COMSOL/COMSOL63/Multiphysics/apiplugins/*.jar, which is the default location on Windows®. Note that the backslashes between directories have been replaced by regular slashes. Alternatively, you can enter double backslashes. Remember to save the settings (Ctrl+S). You will notice that all the former syntax errors highlighted in the code have been cleared.
The file path will differ based on the installed version.
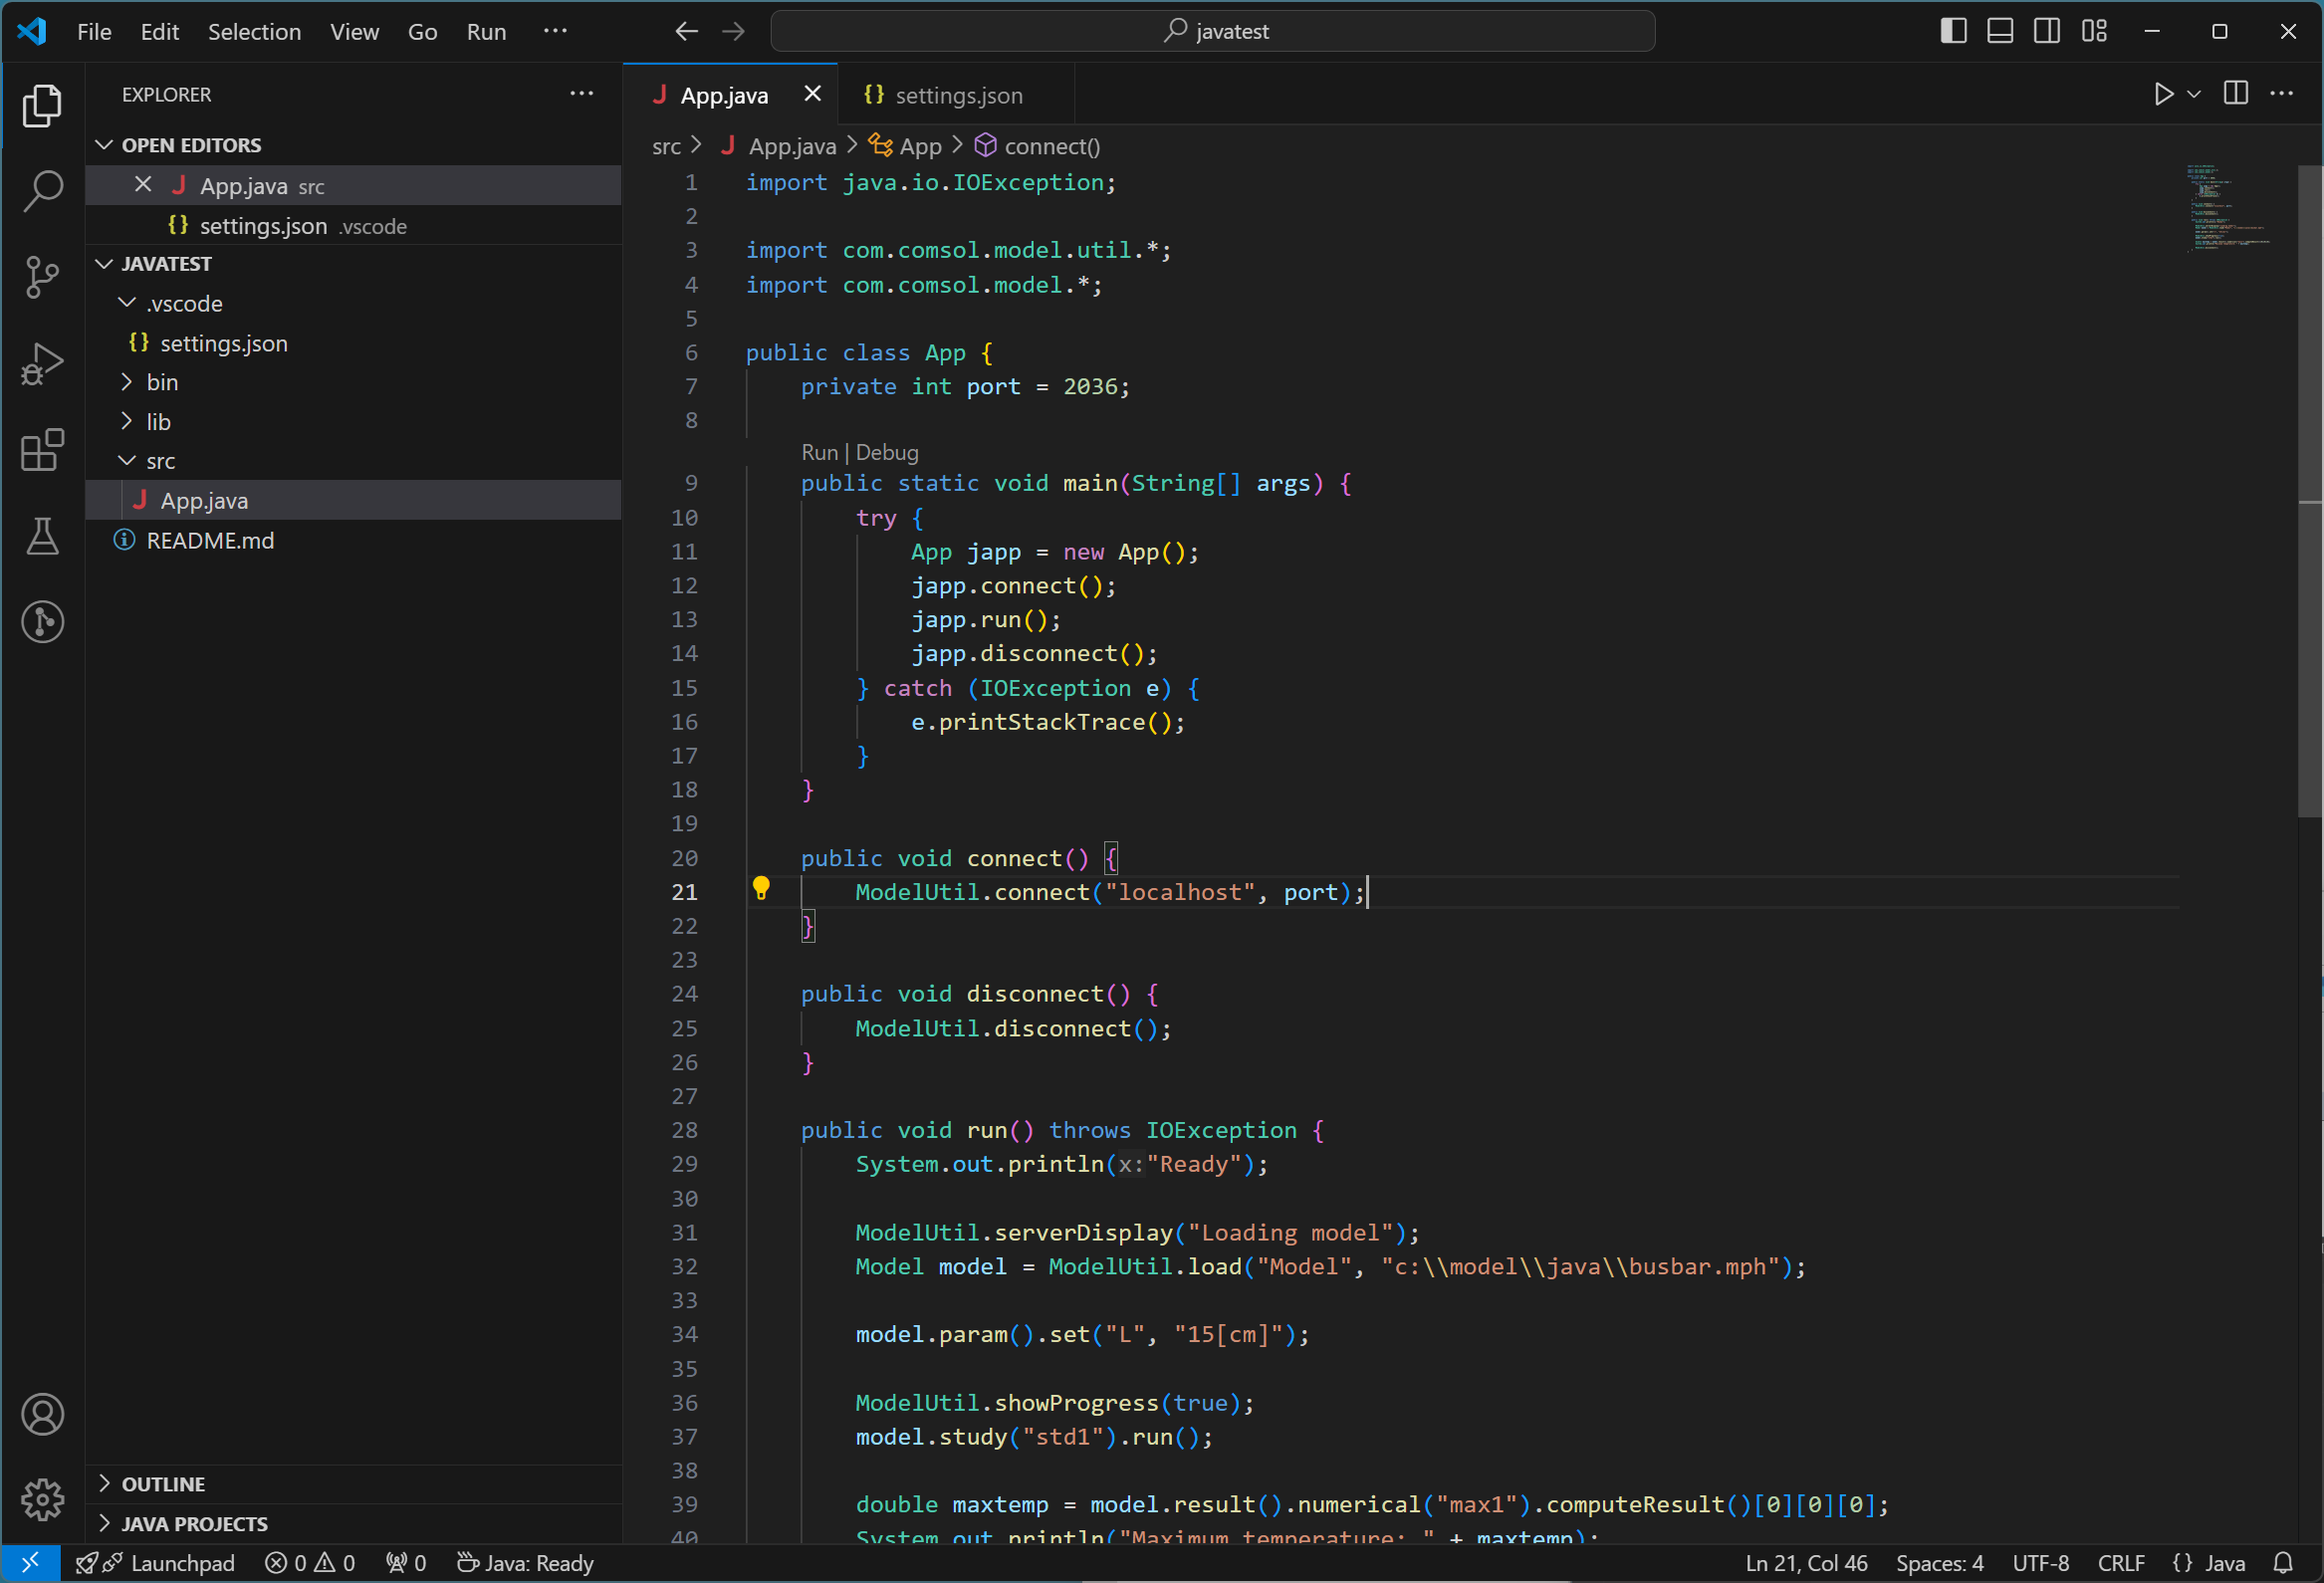
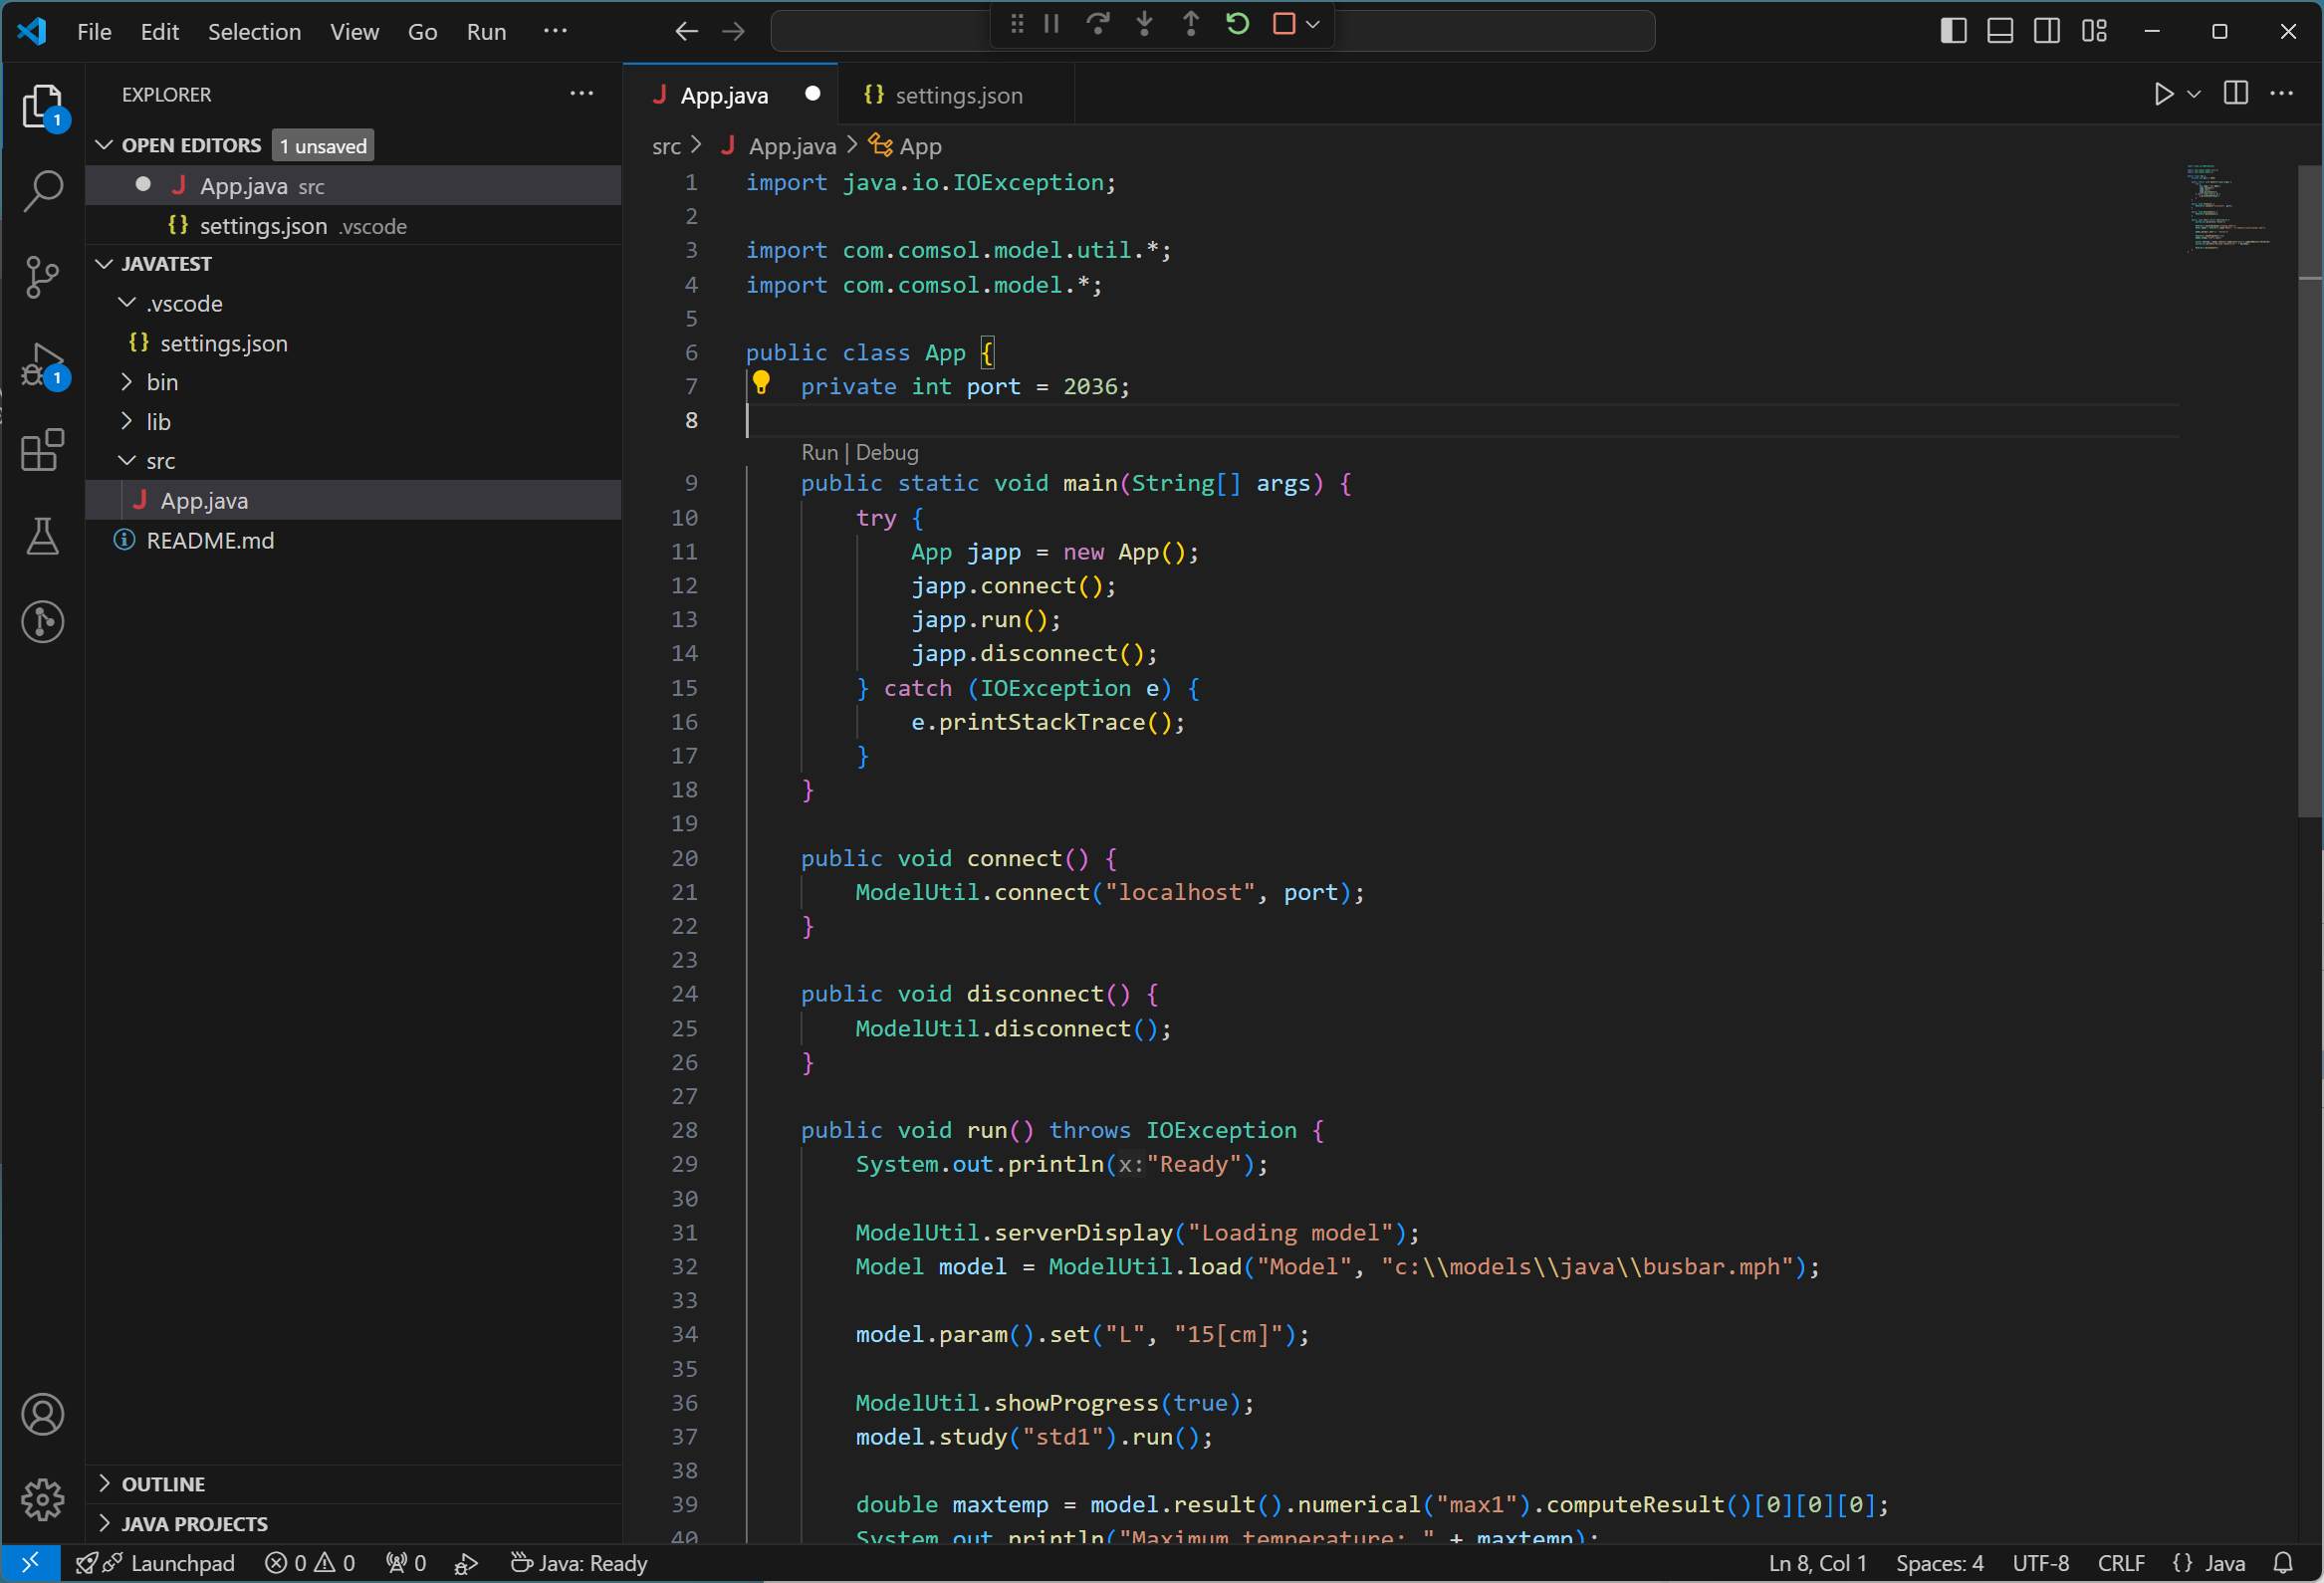
The contents of the test Java file in the VS Code editor.
Testing the Java Project
To start a COMSOL Multiphysics® server, open a command window and execute the following command: "c:\Program Files\COMSOL\COMSOL63\Multiphysics\bin\win64\comsolmphserver.exe". Remember to include the quotation marks. Check that the server writes that it is using the port number 2036, since the code expects this port number. You may update the Java code if you need to support other port numbers.

The command prompt window after executing the command to start a COMSOL Multiphysics® server.
Start the application by clicking on the Run link right above the line that says public static void main(String[] args).
The contents of the test Java file open in VS Code, with the Run link available within the code.
Upon clicking the Run link, you obtain the following outputs in the server window and VS Code, respectively.

The output in the Command Prompt window after selecting the Run link in VS Code.

The output in VS Code after selecting the Run link.
Update Java JDK Settings
VS Code will look for any installed Java Development Kits (JDKs) at startup. You can specify additional Java Virtual Machines (JVMs) if preferred, but you need to edit the configuration files manually for this. To do so first open the Settings window. Click the Manage button (the gear icon in the bottom left of the window) and select Settings.

A screenshot of VS Code with the settings open.
Search the settings for java.configuration and click on the link Edit in settings.json.

The search results for the settings in VS Code.
From here you can make the necessary changes in the file. Examples of potential entries are available here. Remember to save the file.
You may need to force VS Code to recompile your project after changing the JDK settings. To do so, open the Command Palette, enter compilation, and select Java: Force Java compilation. If you do not already have a Java JDK installed when going through the procedure above, then VS Code may ask you to download and install a JDK.

A screenshot of VS Code with the option to install JDK highlighted.
The code editor is now enabled to compile Java code that uses the COMSOL API.
请提交与此页面相关的反馈,或点击此处联系技术支持。