How to Navigate the COMSOL Multiphysics® User Interface
This eight-part course covers the user interface in COMSOL Multiphysics® and the fundamentals of interacting with the software. We will show you how to navigate the modeling environment and introduce you to the tools, menus, and buttons to efficiently build your models.
The course begins by providing an introduction to the COMSOL Multiphysics® user interface, also known as the COMSOL Desktop®, before moving into more specifics on how to use the Graphics window and select geometry. After that, when you have started building your own models, there are features and functionality to modify the COMSOL Desktop® layout, search within your model, and utilize keyboard shortcuts. Finally, there is an article on how to use the help resources within the software for any questions that might arise.
An overview of the course, each part, and what is covered can be seen below:

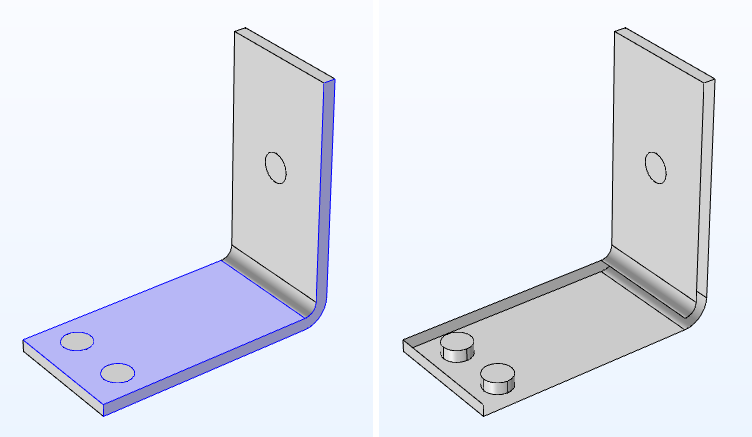
View of the selected boundaries before (left) and after (right) applying the Hide for Geometry feature. Demonstrated in Part 3.
Part 1: Introduction to the COMSOL Desktop®
- Model Builder window and toolbar
- Adding features from the ribbon
- Settings window
- Graphics window and toolbar
- Messages/Progress/Log windows
Part 2: Using the Graphics Window
- Fundamental Graphics window operations
- Using the View node
- Using the camera
- Camera shortcuts
Part 3: How to Select Geometry
- Basic geometry selections
- Graphics window context menu
- Identify geometric entities with geometry labels
- Geometric entity color display based on selection status
- Hiding or showing geometric entities
Part 4: Personalize the COMSOL Desktop®
- Maximizing windows
- Resizing, floating, hiding, and closing desktop windows
- Tiling plot windows to show multiple plots and graphs
- Show option for the Messages window
- Restoring the COMSOL Desktop® to a built-in layout
Part 5: Searching Models, Data and Autocompleting Expressions
- Find tool
- Auto Completion functionality
- Auxiliary data
- Model merge
Part 6: Learning to Use General-Purpose, Time-Saving Features
- Using the Go to Source button
- The Quick Access toolbar
- Double-clicking to quickly add features
- Preference for unit system in new models
- Compact saves
Part 7: Utilizing Keyboard Shortcuts
- Navigating the Model Builder tree
- Useful keyboard shortcuts for COMSOL Multiphysics®
- Keyboard shortcuts for the Application Builder
Part 8: Accessing Help Resources Within COMSOL Multiphysics®
- Help and resources within COMSOL Multiphysics®
 The COMSOL Multiphysics Model Builder with the Graphics window split into a grid of 4 results plots for temperature, solid stress, isothermal contours, and stress in a solder joint.
The COMSOL Desktop® is customized to show four windows tiled with different visualizations of the results displayed. Learn more in Part 4 of the course.
Upon completing the course, you will be comfortable working in the software modeling environment. The course will have familiarized you with the various windows, menus, and buttons contained therein. You will be knowledgeable in the shortcuts, tools, and functionality you can use to expedite building or getting help with building your models.
请提交与此页面相关的反馈,或点击此处联系技术支持。
